

E-Commerce Strategies
Oct 8, 2025
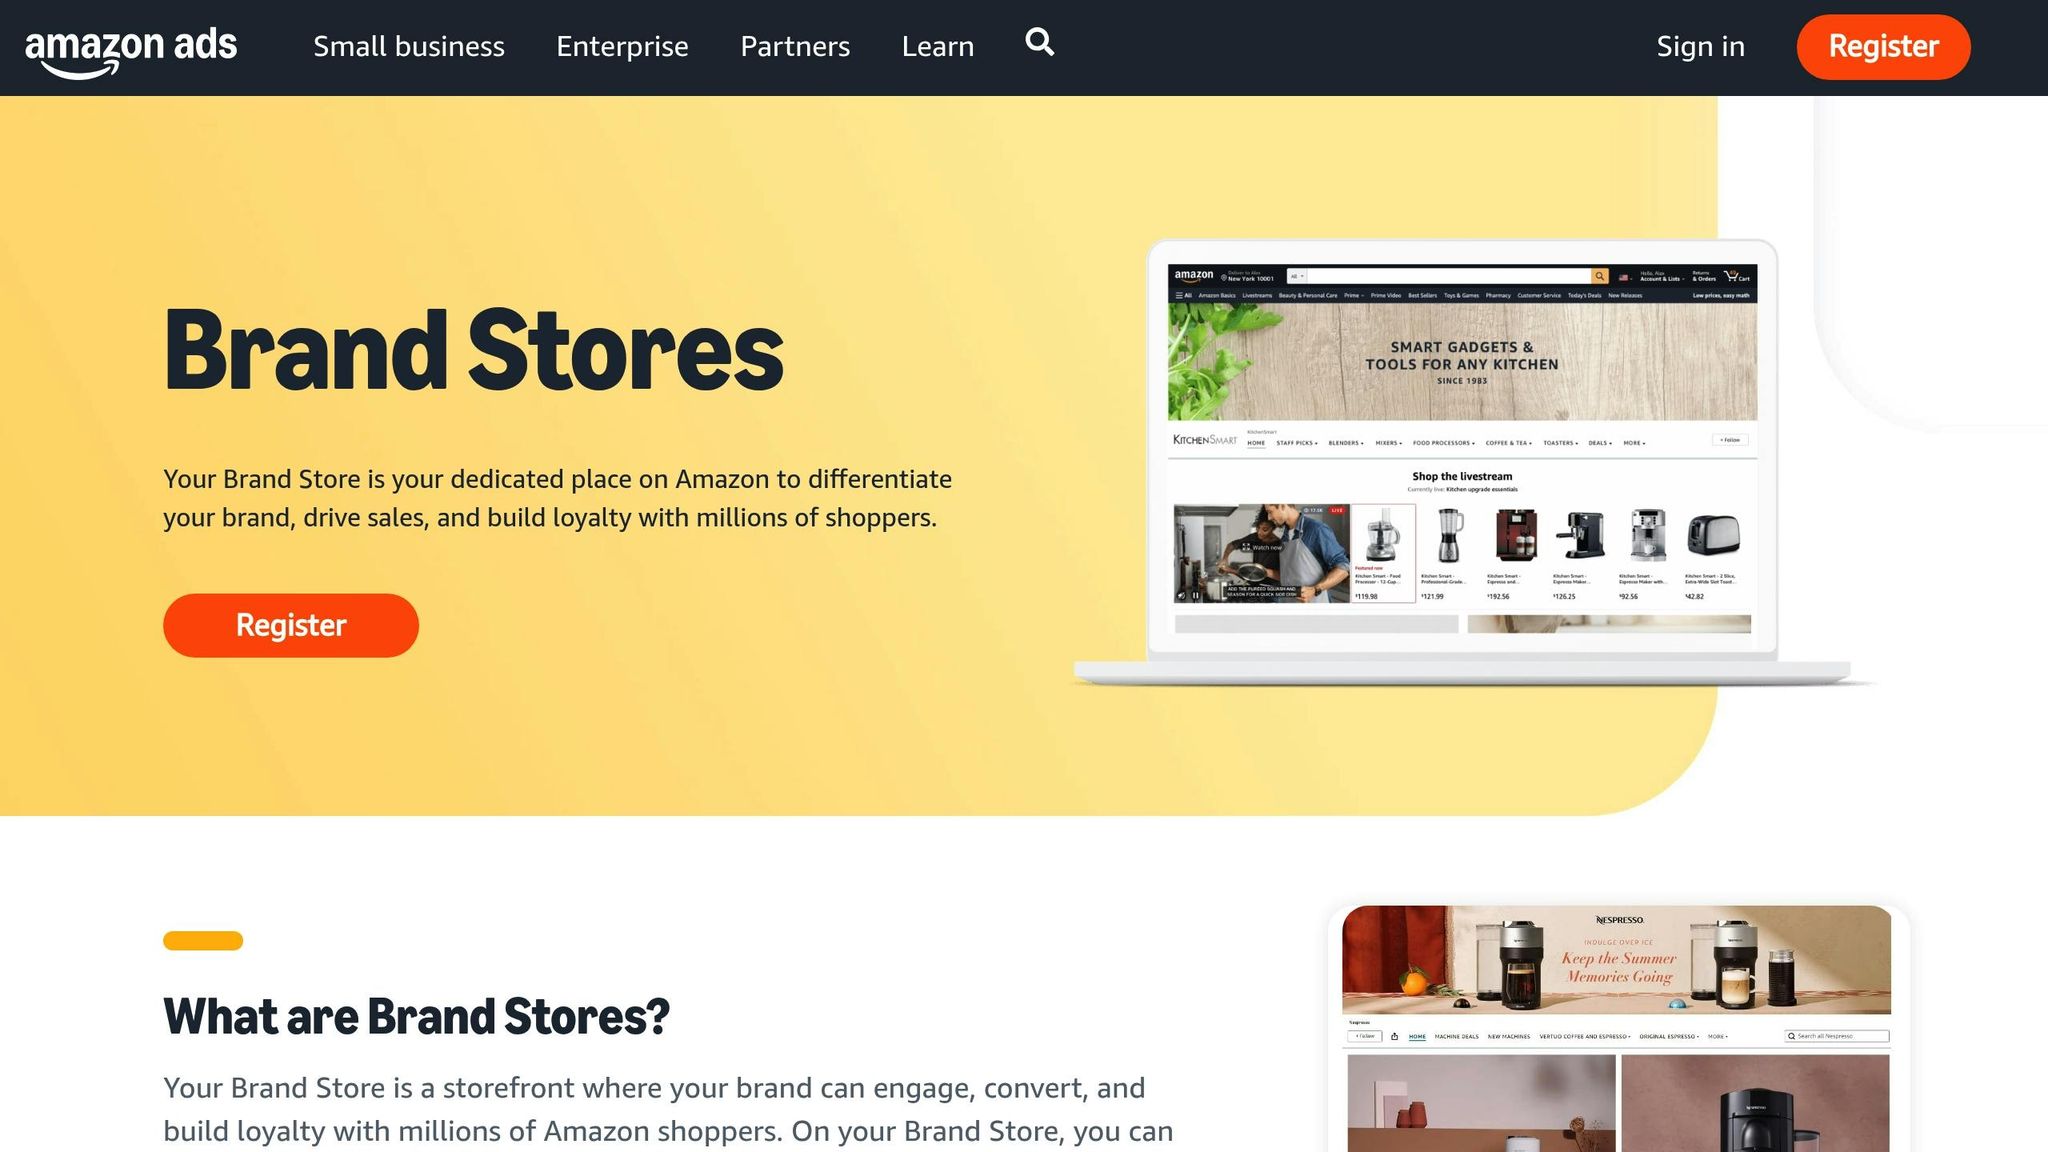
Want to boost your Amazon sales? Creating an Amazon Storefront can help you showcase your brand, organize your products, and improve customer engagement. Here’s what you need to know to get started:
What is an Amazon Storefront?
It’s a customizable space on Amazon where you can display your entire product catalog, share your
brand story, and improve the shopping experience.
Why create one?
Visitors to a Storefront spend
72.3% more per order and are 62.7% more likely to make a purchase compared to regular Amazon listings.
What do you need?
A Professional Seller Account ($39.99/month).
Enrollment in Amazon Brand Registry (requires a trademark and branded product packaging).
How to build it?
Use Amazon’s Store Builder tool to design your Storefront.
Choose from templates like Marquee (brand storytelling), Product Grid (large catalogs), or Product Highlight (featured items).
Add content blocks, such as videos, product grids, and shoppable images, to organize your products and tell your brand’s story.
Key tips:
Optimize for mobile users (69% of visitors shop on mobile).
Regularly update your Storefront to keep it engaging.
Link your ads to your Storefront for better performance.
Quick Comparison | Regular Amazon Listing | Amazon Storefront |
|---|---|---|
Customization | Basic product details | Full brand personalization |
Product Display | Individual listings | Entire catalog showcase |
Brand Story | Limited space | Dedicated brand pages |
Shopping Experience | Standard Amazon interface | Custom, ad-free layout |
Analytics | Basic metrics | Advanced performance data |
Ready to create your Storefront? Start by setting up a Professional Seller Account and enrolling in Brand Registry. Then, use Amazon’s Store Builder to design your Store, organize your products, and connect with your customers.
Before You Start: Required Setup
Setting Up Your Seller Central Account
A Professional Seller Account costs $39.99 per month and includes tools for advanced listing, pricing, and promotions. Unlike an Individual Seller account, which charges $0.99 per item sold, a Professional account allows unlimited listings and provides access to advanced tools and analytics.
Here’s what a Professional Seller Account offers:
Feature | What It Means for You |
|---|---|
Unlimited Product Listings | No per-item fees, sell as much as you want |
Advanced Selling Tools | Manage inventory and create bulk listings easily |
Access to Brand Features | Build a Storefront and create enhanced content |
Performance Analytics | Gain insights with detailed sales and traffic data |
Recent data shows that over 70% of Amazon sellers make their first sale within 60 days. Once you’ve set up your account, the next step is registering your brand to access even more features.
Registering Your Brand on Amazon
To register your brand with Amazon Brand Registry, you’ll need:
A registered or pending trademark from an approved government IP office
A brand name that matches the trademark exactly
Permanent branding on your products or packaging
Amazon Brand Registry helps protect your brand by monitoring for counterfeit products. Best of all, this service is included with your registration at no extra cost.
Once registered, you’ll be ready to upload your brand materials and finalize your setup.
Preparing Your Brand Materials
Here’s what you need to gather to complete your Brand Registry:
Brand Assets
A high-resolution logo matching your trademark
Product images with visible branding
Your brand’s website URL (if applicable)
Documentation
Your trademark registration number
Manufacturing or distribution details
Information about your product category
Visual Content
Photos showing permanent brand markings on your products
Packaging images that clearly display your brand name
Distribution documentation, if requested
Keep in mind that your brand name must be permanently attached to your products or packaging. Temporary solutions like stickers or removable labels won’t qualify for Brand Registry approval. This ensures your brand remains authentic and helps protect consumers from counterfeit goods.
Building Your Amazon Storefront: Step-by-Step
Opening Store Builder
To get started, log into Seller Central and find Store Builder under the Advertising tab. From there, select the brand you'd like to manage from your registered list. If you're using the Amazon Advertising Console, access Stores directly from the main dashboard.
Selecting Your Store Layout
Once you've chosen your brand, you can design the look of your storefront by picking a layout that fits your needs:
Template Type | Best For | Key Features |
|---|---|---|
Marquee | Telling your brand's story | Large hero images, video support, multiple content sections |
Product Grid | Displaying large catalogs | Clean product layout, easy navigation, and organized categories |
Product Highlight | Promoting featured items | Focus on spotlight products, deals, and seasonal promotions |
Stores with three or more pages tend to perform better, with 83% higher shopper dwell time and 32% more attributed sales per visitor. For example, Peloton's storefront uses a looping video at the top of its homepage to grab attention and showcase the energy of their fitness products.
Setting Your Store's Web Address
After finalizing your layout, secure a custom web address to represent your brand. In Seller Central, navigate to Settings > Account Info. Under Business Information, edit the Display Name to set your Storefront URL (format: www.amazon.com/shops/yourstorename).
Pro Tip: Pick a URL that's simple, reflects your brand name, includes relevant keywords, and stands out from competitors.
Store Design and Layout
Working with Content Blocks
Amazon offers a variety of content block types to help you design an appealing storefront. Each type serves a distinct role in highlighting your brand and products.
Block Type | Best Use Case | Key Specifications |
|---|---|---|
Split Section | Brand storytelling | Preset layouts with customizable content |
Product Editorial | Detailed descriptions | ASIN-linked with expanded product details |
Shoppable Image | Visual sales | Tag up to 6 products per image |
Background Video | Hero sections | 2–20 seconds, 1,280 x 640px minimum |
Product Grid | Category displays | Organized layout for multiple products |
Arrange these blocks with a clear visual hierarchy. For example, Dokotoo uses video modules to showcase their clothing in real-life settings, followed by detailed product features and sizing details. By carefully planning your block arrangement, you can tell a compelling story that resonates with your audience.
Adding Your Brand's Story
Emotional connections with customers can lead to a threefold increase in lifetime value. To build these connections, focus on these elements:
Mission Statement: Clearly communicate how your products address customer needs.
Brand Values: Emphasize what sets your company apart.
Visual Elements: Use high-quality lifestyle images that show your products in action.
Jackery is a great example of this approach. They share their mission of supporting outdoor enthusiasts with sustainable solutions. Their store effectively combines lifestyle imagery with practical product details, creating a seamless and engaging shopping experience. Don’t forget to ensure your layout works well on mobile devices for a complete experience.
Mobile Display Settings
With 69% of Brand Store visits coming from mobile devices in 2021, optimizing for mobile users is critical. Here’s how to do it:
Header Image:
Use separate mobile images featuring no more than 3 products.
Limit text to 30 characters and use a minimum font size of 90pt Arial.
Layout Requirements:
Ensure content flows left-to-right.
Place key call-to-action elements above the fold.
Provide alternative navigation options.
Test your design on mobile devices to ensure readability and functionality.
Product Organization and Display
Setting Up Product Groups
Organizing your products clearly makes it easier for customers to find what they need. Amazon's Store Builder lets you group up to 60 products into collections.
Here’s how to set up product groups:
Create Main Categories: Start with broad, straightforward categories to keep it simple for shoppers. For example, if you sell kitchen appliances, you might use categories like:
Small Appliances
Cooking & Baking
Food Storage
Kitchen Accessories
Add Product Collections: In Store Builder, click "Add New Section" and select the product collection tile. Customize it with:
Mobile-friendly header images
Clear, benefit-focused titles
Curated product selections
Custom layout options
Once your groups are set, highlight key products and deals to guide your shoppers effectively.
Displaying Top Products and Deals
Strategic product placement can make a big impact. According to McKinsey & Co., this can boost sales by 20% and overall profits by 30%. Focus on these elements:
Display Type | Best Practice | Implementation Tips |
|---|---|---|
Best Sellers | Feature top products prominently | Use the "Best Selling Products" tile |
New Arrivals | Create dedicated pages | Add hero images with clear CTAs |
Seasonal Items | Highlight time-sensitive items | Update collections for events like holidays |
Special Deals | Emphasize pricing and discounts | Use Money Off coupons for high-value items |
"The in-store experience is key for brands to drive shopper loyalty and increase sales." - Amazon
Plan promotions around major shopping events like Prime Day, Black Friday, or Cyber Monday. Set coupon durations of 2-3 months to ensure customers have time to discover your deals.
Adding Product Recommendation Widgets
Recommendation widgets are a great way to increase average order value by cross-selling complementary items.
To make these widgets work for you:
Use Product Attribute Targeting (PAT) to suggest related products.
Monitor click-through rates and engagement for insights.
Experiment with different promotional setups to see what performs best.
For instance, a skincare brand selling retinol serum could use PAT ads to suggest matching eye creams, encouraging customers to add more to their cart. This not only boosts sales but also enhances the shopping experience by helping customers find related products easily.
Improving Store Performance
Store Search Optimization
Boosting your store's visibility can directly impact customer acquisition. In fact, data shows that visitors to a Brand Store are 62.7% more likely to make a purchase.
Here’s how to make your store easier to find:
Write clear, keyword-focused titles: Ensure your titles accurately describe your products.
Use detailed product descriptions: Incorporate relevant search terms to improve discoverability.
Optimize image alt text: This helps your images appear in search results, improving overall visibility.
Keep branding consistent: A cohesive look across your store builds trust and recognition.
"A well-structured Amazon Brand Store not only makes a strong first impression but also plays a crucial role in improving customer engagement and increasing sales. Customers tend to trust brands that invest in their Amazon storefronts, as it shows professionalism and dedication to quality." - Anthony Steele, BrandBuddy.co
Reading Store Performance Data
Amazon Store Insights provides daily-updated analytics to help you track your store’s performance. Basic metrics are available the next day, while sales data takes up to 48 hours.
Here are key metrics to monitor:
Metric | What to Track | Why It Matters |
|---|---|---|
Daily Visitors | Traffic volume | Shows how well your store attracts visitors |
Page Views | Content engagement | Highlights which pages hold the most interest |
Sales | Revenue generation | Tracks how well your store converts visitors into buyers |
Traffic Sources | Visitor origin | Helps refine your marketing strategies |
For a more detailed view, consider the Brand Store Insights subscription available through the Amazon Marketing Cloud (AMC). This tool provides insights into shopper behavior, revealing that customers who visit Brand Stores spend 72.3% more per order compared to those who don’t.
Using these insights alongside your ad strategy can help you refine your approach and improve store performance.
Linking Ads to Your Store
Connecting your ad campaigns to your Brand Store can significantly enhance results. Sponsored Brands campaigns linked to your store deliver:
55% more product detail page views
15% higher sales
52.1% higher add-to-cart rates
71.3% higher average order value
Keeping your store content fresh is also key. Stores updated within the last 90 days see 11% more repeat visits and 13% higher sales per visitor. Additionally, use Amazon's Products page to identify your best-performing items and create targeted campaigns around them. Regular updates and strategic advertising can keep your store ahead of the competition.
How to Set Up Brand Store on Amazon: Step By Step Guide
Conclusion: Next Steps for Your Store
Now that your Storefront is live, keeping it updated and performing well is key to long-term success.
Monitor Performance Daily
Leverage tools like Amazon Brand Analytics to keep an eye on important metrics such as views, conversion rates, and average order values.
Keep Content Fresh
Regularly update your Storefront to maintain its appeal. Focus on:
Seasonal listings
Monthly promotions
Adding new A+ Content
Introducing Virtual Bundles
Once your content is updated, work on driving traffic from multiple channels.
Drive Traffic from Various Sources
Since 75% of online shoppers begin their search on Amazon, it's essential to use multiple traffic sources effectively. Here's a quick breakdown:
Traffic Source | Expected Impact | Implementation Priority |
|---|---|---|
Boosts visibility fast | High | |
Social Media | Builds brand awareness | Medium |
Email Marketing | High ROI potential (42:1) | Medium |
Influencer Partnerships | Influences 87% of buyers | High |
Finally, prioritize quick and efficient customer support to strengthen loyalty and keep shoppers coming back.


